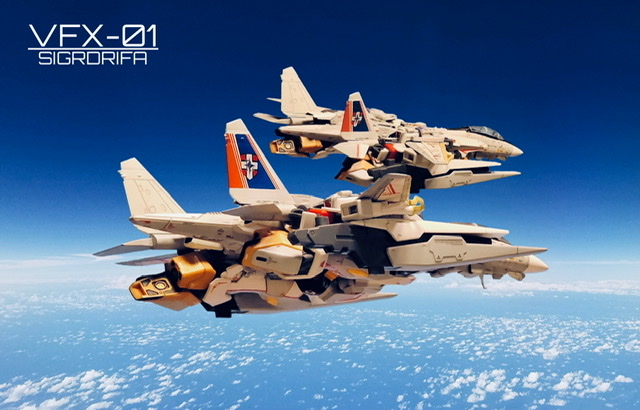
HG Silhouette Gundam Formula Valkyrie: FV series No.01 “VFX-01 Sigurdriva” custom: many images, full info
This time, in addition to the deformation, the landing gear deployment / storage and the carrier-based form can be reproduced, but all will be completely deformed without replacement. Landing gear quota clear!
For the first time in remodeling, I tried to work and paint with a brush. I think you can see a lot of low quality, but I hope you enjoy the idea of remodeling.
Since the finished product after remodeling does not seem to be different, I made it as a demonstration machine for Reginlaze and a warlord for Sigurdriva
The description will be long. Background composition is also increasing, but I hope you can see it if you like.
This time, i mainly remodeled the fighter form.
First, I attached a propellant tank-like “tail” to the rear of the aircraft. This is because I was worried that the side silhouette was longer than the backpack in the previous work.
For the tail parts, we used the model parts of the 30MM series “Exa Vehicle Air Fighter”. By sticking a plastic plate to this part, I was able to further camouflage the head part that was half hidden in the previous work. It’s not embarrassing whether it’s taken from the side or from behind. I’m a little unsure on the underside. .. ..
I also attached the tail wings. This is a junk item.
In terms of settings, the Reginlaze is used as an actual combat deployment aircraft, so it seems that the tail wings have been added as a result of emphasizing more stable flight.
Since the mounting shaft of both the tail and vertical stabilizer rotates, various expressions can be made.
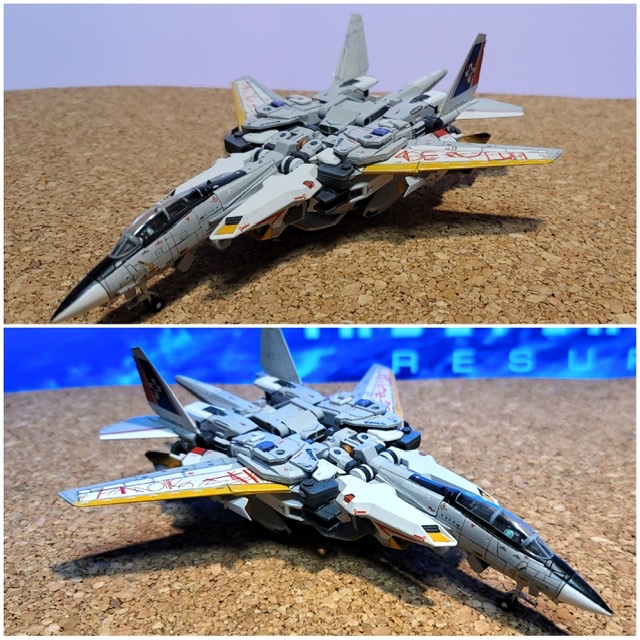
It is a fighter form 6-sided shot. The image is inevitably rough. disappointing.
Compared to the previous work, the decals increase the amount of information and it is a lot messy, but I think that the silhouette has improved. ..
The design from the nose to the main wing was based on the American “F14”, and from there to the rear was based on the Russian “Su-57”.
The points I paid attention to were the overall fit, thickness and size. Since we were planning to add more parts this time, it was difficult to keep the thickness and size the same, but we managed to get it together.
As an improvement of the entire aircraft, I am “filling the gap with plastic boards”. Addition of heat radiation fins to the connection between the nose and waist, additional parts around the abdomen, and the gap between the thruster unit and arms. Parts are also added on the main wing. I made this as a weapon rack, but it became an i-field generator because the clearance at the time of MS became very narrow. The parts were made from the 30MM Exa Vehicle and the plastic board.
Armed can now be equipped by attaching the “F14” pylon with a 1mm brass wire to the main wing. I will explain the details of the armament later, but since the main wing position of the fighter form is high, I tried to install a large armament. It seems that the actual high-wing aircraft also has the advantage of being able to operate large-scale weapons, and it is a form that is in line with that.
The landing gear can be deployed and stored without replacement. With this, I feel that the feeling of an airplane will be greatly improved. I can now take pictures of diorama.
Since the tire house was also made for the front wheels, the gimmick of the nose part is heaped up, and the parts of each moving part are tight. In addition, the paint is also applied, so once it is deformed, some part of the paint will come off.
After that, the tire cover will definitely break due to air resistance if it is an actual machine. .. That area is packed with Universal Century ton demo technology.
It is in a disarmed state. In this state, the feeling of Gunpla will fade.
This time, the painting was a brush painting debut, so I used the rumored Citadel color, which is kind to beginners and has no odor.
White part: Gundam Marker New White → Citadel White Scar (Layer)
Light gray: Citadel Colux White (base)
Black: Citadel Abandon Black (base)
Yellow: Citadel Juliel Yellow (Layer)
Red (chest, shoulders only): Citadel Mephiston Red (base)
Gold: Citadel Retributor Armor (Base)
After painting each part, Citadel Storm Shield (Technical) is applied to strengthen the paint film. .. .. If the parts are rubbed a little, they will come off. After all, I have the impression that it may not be possible to deal with the rubbing of moving parts unless it is a spray top coat.
However, it is easy to apply. As rumored, it dries quickly, so I felt that the hurdle for recoating was not high. I was surprised that the paint on the palette dried quickly.
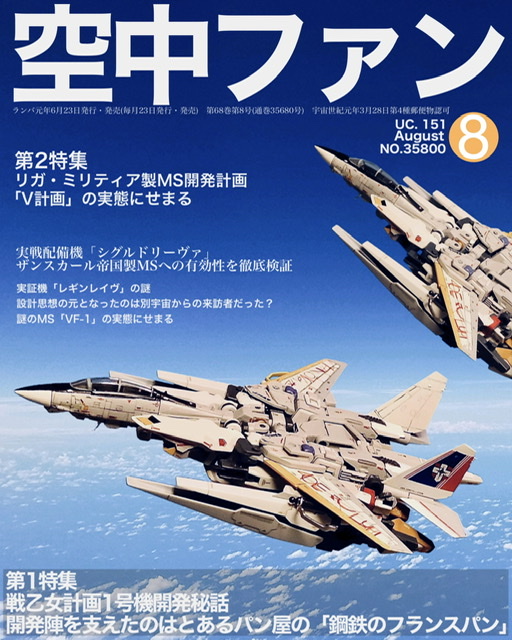
This is the first thing I wanted to do once I completed a variable MS that I was satisfied with. Colony An aviation magazine from the Warring States period. When I tried it, I realized the sweetness of my brain settings. By the way, the owner of a certain bakery is Mr. Seabook.
As for the decals I put on this time, I used various caution decals that I had at hand. It is a decal of the main wing, but it was a mistake to think that the decal of the blue frame second rebuy could be pasted with the tension at midnight. This paint is …
The biggest problem was whether to put the national flag, number and emblem, but I didn’t have a crossbone decal at hand, so I put an emblem with a similar design as a national flag. When I looked it up later, I was made to be Captain Ral. I’m sorry it’s not blue!
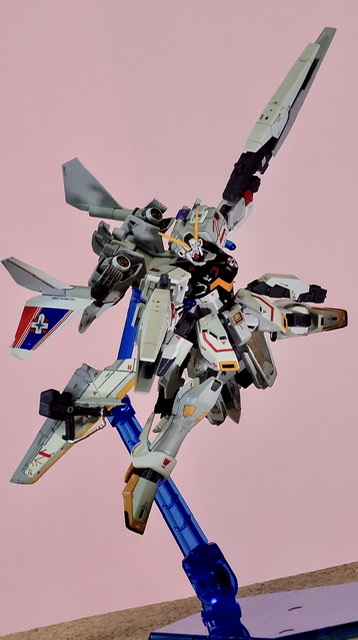
MS form. The transformation gimmick is not much different from the previous work, so I will omit it.
I think that the MS form has changed considerably compared to the previous work. The modification was basically carried out in the fighter form, and finally in the MS form to check the deformation mechanism and movable range.
So this figure has too many components. Even so, I managed to stand on my own with the launcher attached.
Not only the launcher on the front but also the backpack on the back has been increased in volume, and the bulletproof plate is attached to the shoulder, so the feeling of mess is amazing.
For the time being, the range of movement is not much different from that of the Reginlaze era, but the movable shoulder axis is painted, so it is difficult to play. If you are not careful, the parts will be caught and the paint film will peel off immediately.
I gave it a launcher. This armament is an “A-Z mega launcher” that only pilots who have a premium prime contract with Amazonite for 500 credits per month are allowed to shoot at full power.
Actually, the size of this mega launcher was the same as that of the Muramasa Blaster of the HG Crossbone series, and the shape of the launcher was similar to the F91, so I decided to equip it. For the time being, the shoulder shaft is held without losing weight and dripping. But it’s still big
Although it is a silhouette of MS form, I tried to remodel it while keeping the “Gundam-ness” firmly.
Specifically, i tried to differentiate between Battroid and Gundam by remodeling the shoulder, chest, and waist skirt parts as much as possible.
However, if the rear wheel part of the landing gear is in the MS form, it will be exposed, and the result will be a transformer feeling.
Premium Prime Mega Launcher is in full shooting.
Added the ability to equip two beam zumbers for close combat. Here, the handle part of the handle is attached to the 1 mm shaft added to the pylon of the main wing.
The mega launcher is attached to the pylon and the line of sight can be directed forward. Also, since the scissor anchor of the side skirt can have a zamba, you can deploy the zamba and the beam shield while keeping the line of sight.
In the end, the armament is a mega launcher, beam zumber, scissor anchor, actually a diffuse beam cannon on the waist, brand marker and heat dagger are alive from the head family, so I think that it has become a specification sufficient for the operation of the actual combat deployment machine.
Since the original is Crossbone Gundam, it seems that the production cost is not odd. .. ..
Work by Lab@Henkel-gunpr


